
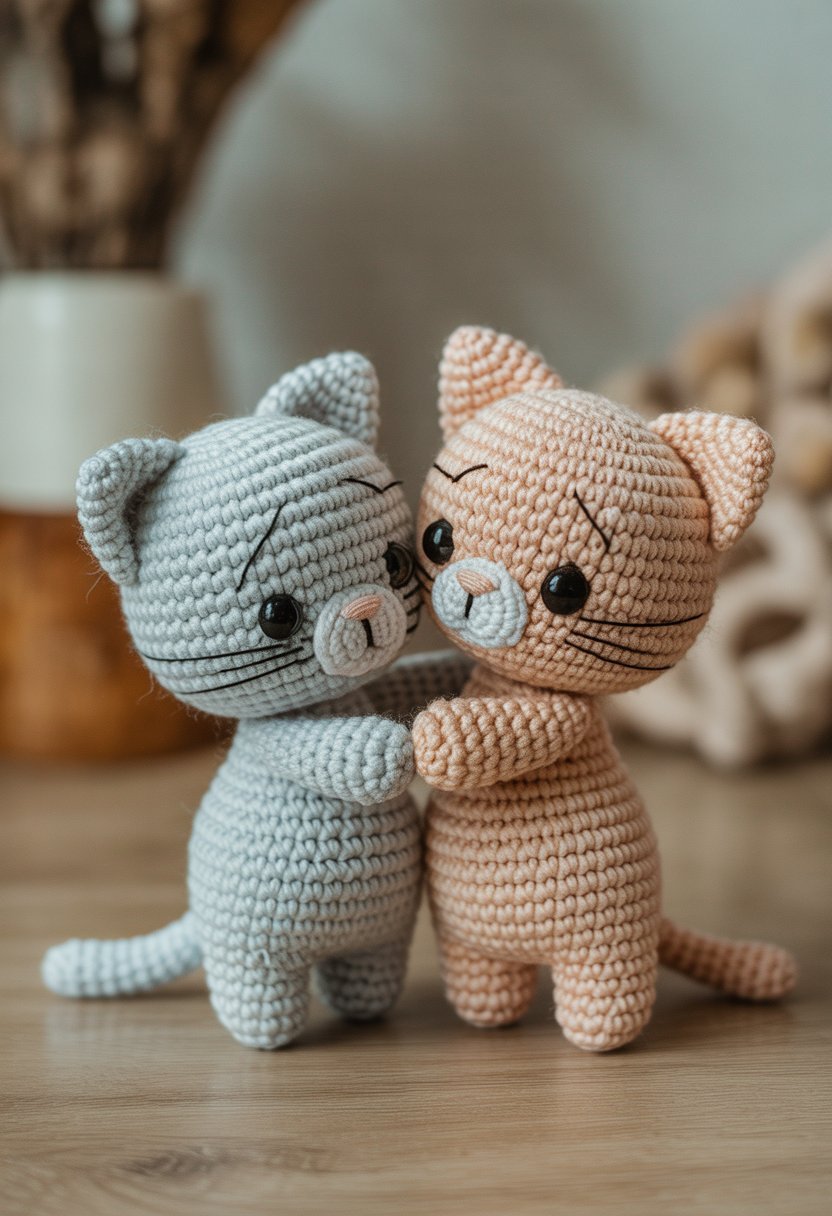
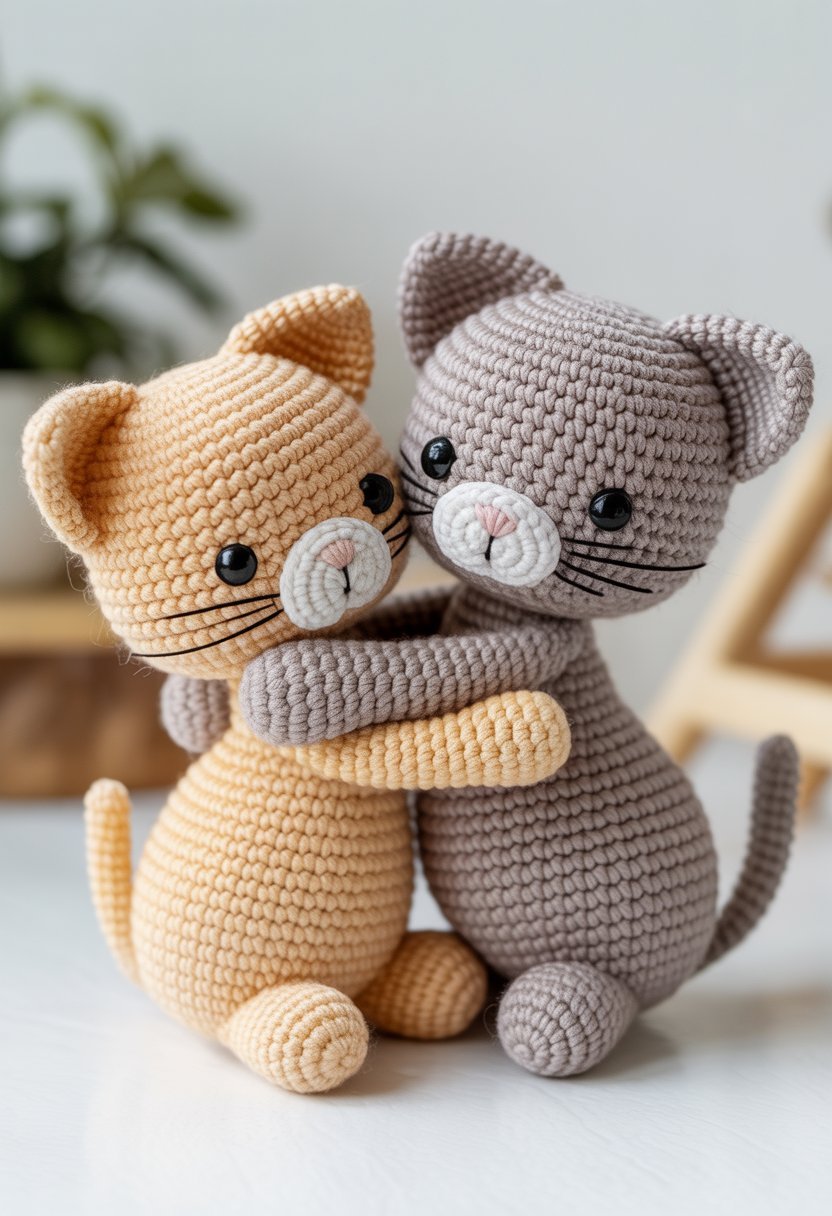
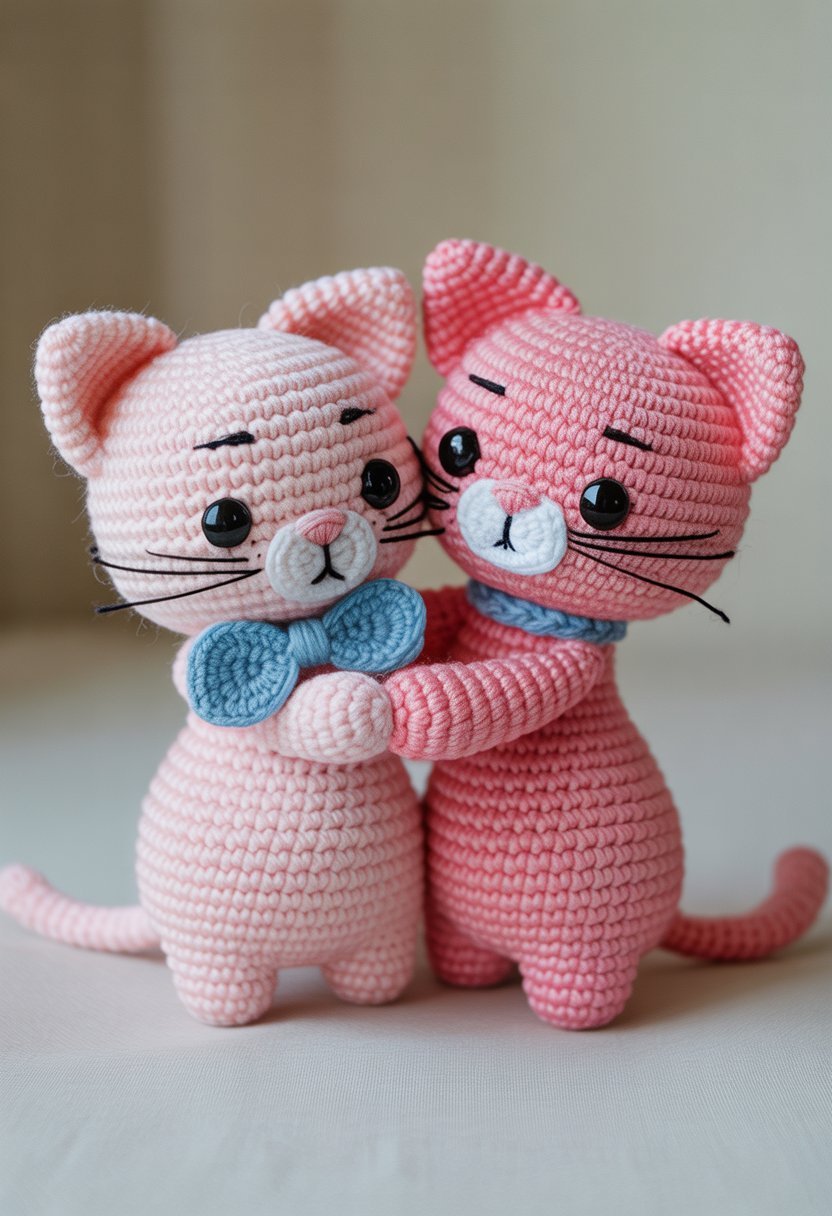
Amigurumi Hugging Cats are a sweet pair of crocheted figures, designed to sit together with their tails forming a heart. They wear pastel accessories—one has a blue bow, the other sports a pink bowtie—and their soft, friendly faces make them perfect for occasions like Valentine’s Day or anniversaries.
This pattern is great for crocheters who enjoy romantic or whimsical projects. You can easily personalize them with different colors or accessories, or even make a whole group of hugging animals if you’re feeling ambitious.
Amigurumi Hugging Cats Crochet Pattern
Skill Level Required
This project is best for intermediate crocheters. You’ll need to shape heads and bodies, join limbs, and finish everything off neatly. If you’re comfortable with continuous rounds, joining pieces, and simple embroidery, you’re good to go.
Final Dimensions
Each cat stands about 22–24 cm (8½–9½ in) tall if you use velvet or chenille yarn with a 3.5 mm hook. When you place them together, their tails curve into a heart shape. It’s pretty adorable, honestly.
Needed Supplies
- Yarn: velvet/chenille
- Blush pink — about 100 g (for one cat)
- Baby blue — about 100 g (for the other cat)
- Small amounts: white (for cheeks/mouth), peach (noses), brown (whiskers)
- Hook: 3.5 mm
- Stuffing: polyester fiberfill
- Eyes: 6 mm safety eyes, or embroider them for a softer look
- Tapestry needle and scissors
- Stitch markers
Shortcuts and Stitch Notes (US)
- MR — Magic Ring
- sc — Single Crochet
- inc — Increase (2 sc in one stitch)
- dec — Decrease (sc2tog)
- sl st — Slip Stitch
- ch — Chain
- FLO — Front Loop Only
- FO — Fasten Off
Pink Cat (with Blue Bow)
Head (Pink Rounded Top)
Start with a magic ring and work a small sphere for the head. Increase evenly to make a smooth dome, then keep the same stitch count for a few rounds to add height.
Decrease steadily to close the top. Stuff it firmly before you finish off. You want a neat, compact head that sits well on the body.
Torso (Pink)
Make a slightly pear-shaped body by increasing from a small base. Work even rounds to build it up, then toss in a few extra increases around the chest for a gentle curve.
Continue with even rounds, then decrease toward the neck. Stuff it tightly and fasten off. The body should be stable enough to hold the head and limbs without wobbling.
Arms (Bent, Photo-Accurate Curve)
Begin each arm from a small ring, increasing into a narrow tube. Work several rounds for length, then shape a bend near the elbow by spacing out decreases and short rounds.
Stuff lightly so the elbow stays flexible. Leave a long tail for sewing and curve the arm as you attach it so it hugs the other cat.
Ears (Pair)
Make two small triangles by increasing from a tiny ring and working a few rounds flat. Flatten each piece and stitch it to the top sides of the head.
Place the bow on the left ear before you close up the seam completely.
Tail (Long Round Tube)
Crochet a narrow tube from a magic ring, working round after round until you hit about 25 cm (10 in). Stuff as you go to keep it even.
Bend the finished tail so it forms one side of the heart when you pair it with the other cat.
Bow (Ear Decoration)
Chain a short strip, then single crochet back across to make a small rectangle. Finish off, pinch the center, and wrap a bit of yarn around it for the knot.
Sew the bow to the left ear, right on the outer edge.
Blue Cat (with Pink Bowtie)
Neckwear Accent
Use blue yarn for the head, body, arms, ears, and tail. Switch to pink yarn for the nose and bowtie.
- Bowtie: chain 9, then work 4 rows of single crochet across (8 sts). Fasten off, wrap the center, and stitch it under the chin.
Facial Details
- Eyes: Stitch gently curved closed eyes with black thread around rounds 7–9 for a sleepy look.
- Cheeks: Make two small white circles (magic ring, 6 sc, 6 increases = 12 stitches) and attach just below the eyes, a little over the mouth line.
- Nose: Add a tiny peach triangle stitch centered between the cheeks.
- Mouth: Sew a small arched line under the nose in brown or dark pink.
- Whiskers: Add three short horizontal stitches on each side in light brown.
Assembly
- Sew the heads to the bodies so they tilt slightly toward each other. It gives them that gentle, connected look.
- Position the arms so each cat hugs the other: one arm in front, the other tucked behind.
- Curve the tails and join the tips to form a heart. Secure with small stitches.
- Add the bows (blue for her, pink for him).
- Shift the stuffing and mold the shapes until the embrace looks just right.
Finishing Touches
- Lightly brush the yarn to even out the surface.
- Secure limbs and tails with thin, hidden thread for extra strength.
- Add a bit of blush to the cheeks for a warm, gentle touch.
Final Look
They sit side by side, pastel bodies close and tails curled into a heart. The embroidered faces and tiny accessories add a lot of charm.
They make a lovely gift, shelf decoration, or just a gentle keepsake that feels like a hug.
Frequently Asked Questions
Where can someone locate a free pattern for amigurumi hugging cats?
You’ll find free patterns on craft blogs and popular craft sites. Look for pages listing free amigurumi cat patterns or posts about hugging or paired cat designs.
Try searching “free amigurumi hugging cats pattern” to get more specific results.
Helpful places to check:
- Craft aggregator sites with free patterns
- Individual crochet blogs with seasonal or gift-themed designs
- Social media craft groups and pattern-sharing forums
Is a downloadable PDF offered for a hugging-cat amigurumi pattern?
Some designers offer a free PDF download, while others just have a web page pattern. Check the pattern page for a “PDF” or “download” link.
If there’s no PDF, the full instructions are usually right on the page.
Tips:
- Check the pattern license before downloading.
- Look for links to official files to avoid unofficial copies.
How can a person find a video guide for making hugging amigurumi cats?
Video tutorials are on YouTube and some crochet blogs. Search “amigurumi cat tutorial” or “crochet hugging cat video.”
Videos can show shaping, joining, and stuffing to get the hugging pose just right.
What to look for in a good tutorial:
- Clear close-ups of stitches and assembly
- Step-by-step pacing that matches your skill level
- Time stamps or chapter markers for each step
Are there free patterns available for crocheted cat pouches?
Yes, plenty. Free patterns for cat-shaped pouches and bags pop up in roundups or under search terms like “cat pouch crochet free pattern.”
They range from zipper pouches to tiny coin purses shaped like cats.
Pattern notes:
- Check the recommended hook size and yarn weight for durability.
- Confirm the closure type (button, zipper, or flap) before you start.
Where can someone find a free ragdoll-style crochet cat pattern?
Free ragdoll-style cat patterns show up on general amigurumi lists and sites focused on soft toy tutorials. Try searching “ragdoll cat amigurumi free pattern” or scroll through lists of free amigurumi cat patterns for soft-bodied versions.
Suggestions:
- Pick patterns that include body and limb shaping details.
- Look for size estimates to match the doll you want to make.
What is a good source for a free crochet pattern to make a cat-shaped purse?
You’ll spot free cat purse patterns on craft websites, pattern collections, and even a few designer blogs if you look around. Try searching for “free cat purse crochet pattern” or poke through curated lists of free cat patterns—sometimes you’ll find quirky purse or bag designs hiding in there.
Practical tips:
- Check the materials list to see if you’ll need lining or any special closures. Nobody likes surprises halfway through a project.
- Glance at the pattern’s difficulty and gauge info so your purse actually turns out the right size and isn’t a total headache to finish.